
If you’ve ever been inside a computer, you’ve probably noticed a lot of little parts that all fit together to make the magic happen.
The motherboard is one of the most important parts of the puzzle, and it can be a little daunting to figure out how to install one – especially if it has a built in io shield.
Never fear! We’re here to help you through the process step by step, and before you know it, you’ll be a pro at installing motherboards with built-in io shields. Let’s get started!
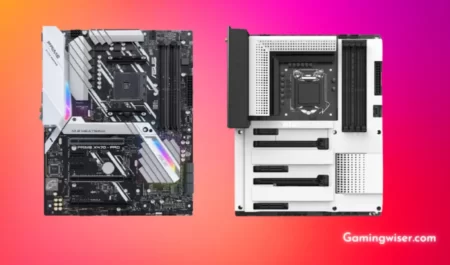
Motherboard with built in IO shield
One of the most important parts of your computer is the motherboard. It’s what everything else plugs into, and it’s what controls all of the different components of your machine.
If you’re building a new computer from scratch, one of the first things you’ll need to do is install the motherboard. This can be tricky, but with a little patience and attention to detail, you should be able to do it without any problems.
One thing to keep in mind is that some motherboards come with a built-in IO shield. This metal piece goes around the edge of the motherboard and protects the various input/output ports from being damaged. If your motherboard has one of these, you’ll need to install it before you mount the board in the case.
To start, you’ll need to gather a few tools and supplies. You’d need a Phillips head screwdriver, something to cut the static wrap if your motherboard came wrapped in it, and something to spread thermal paste if your CPU cooler didn’t come with pre-applied thermal paste. It would be best if you also had your motherboard’s manual handy and the manual for your case.
Once you have everything gathered, you’ll first want to remove any existing hardware from your case. This includes things like drive bays, expansion cards, and cables.
Once everything is out of the way, open up the case and locate where the motherboard will be mounted. In most cases, it will already install standoffs in the appropriate locations.
If not, consult your case manual to find out where they need to go. Once the standoffs are in place, gently lower your motherboard and line up the screws with their holes.
Now it’s time to start screwing things down. Be careful not to overtighten the screws – snug them down until they’re snug but not too tight.
Once all screws are in place, you can move on to installing any expansion cards or drive bays that you removed earlier. Again, be careful not to overtighten anything – snug everything down until it’s secure but not overly tight.
What You Will Need
- Screwdriver
- Motherboard
- I/O shield
- Start by gathering the necessary tools. You will need a screwdriver and your motherboard. You will also require that if your I/O shield is not already installed.
- Locate the standoffs for your motherboard. These small metal cylinders will raise your motherboard off the case and prevent it from shorting out on the metal surface. Install these in the appropriate holes.
- Place your I/O shield in the opening on the back of your computer case. Make sure that all cutouts line up with the ports on your motherboard.
- Line up your motherboard with the standoffs and gently lower it, being careful not to disturb any of the cables or ports.
Once it is in place, use your screwdriver to secure it by screwing in the screws that correspond with the standoffs. Do not overtighten these screws, as this can damage your motherboard and case.
Step One: Prepare the Motherboard
Whether replacing an old motherboard or building a new computer, you will need to install the motherboard.
I/O stands for input/output, and the I/O shield is a piece of metal that covers the ports on the back of the motherboard.
The I/O shield protects the ports from dust and other debris. Most motherboards come with a built-in I/O shield, but if yours does not, you will need to purchase one separately.
To install the motherboard, you will need:
- Phillips screwdriver
- Static wrist strap (optional)
If your computer case does not have standoffs installed, skip Step Two. If it does have standoffs, unscrew them and set them aside. Standoffs are small metal cylinders that elevate the motherboard off the case floor, preventing short circuits.
- Place the I/O shield into the opening on the back of the computer case. The I/O shield should fit snugly into place.
- If your motherboard has integrated graphics, align the port openings on the I/O shield with the graphics ports on the motherboard. Most motherboards have multiple graphics ports so that you can use multiple monitors.
- Line up the holes on the motherboard with the standoffs in the case (if present). If your case does not have standoffs installed, skip to Step Five.
- Gently lower the motherboard and screw it into place using a Phillips screwdriver.
Step Two: Install the Motherboard
Now that the standoffs are in place, you can begin installing the motherboard.
Start by gently placing the motherboard on the standoffs, not touching any of the circuitry on the bottom of the board. If your motherboard has a built-in IO shield, you can install it now. Otherwise, skip to the next step.
To install the motherboard with a built-in IO shield, start by aligning it with the ports on the back of your computer case.
Once it is lined up, gently push it down until it is flush with the case. Be careful not to bend any of the ports on the back of your motherboard as you are doing this.
If your motherboard does not have a built-in IO shield, or if you are not installing it now, you can skip to Step Three.
Step Three: Connect the Power Supply
Now that everything is mounted, it’s time to connect the power supply. Start by clicking the main 24-pin power cable to the motherboard if you use a modular power supply.
If your power supply isn’t modular, or if you are reusing an older power supply that doesn’t have a modular connector, skip this step and connect the cables directly to the components.
Next, connect the 8-pin (or 4+4-pin) CPU power cable to the motherboard. This is typically located right next to the CPU socket. If your motherboard has a separate 4-pin connector for onboard graphics, connect that as well.
Finally, connect any PCI Express power cables to graphics cards or other expansion components. These are typically 6+2-pin or 8-pin connectors and are located next to the corresponding slot on the motherboard.
Step Four: Install the I/O Shield
Installing the I/O shield is pretty straightforward. Just line it up with the ports on the back of your motherboard and screw it in place. Be sure not to overtighten the screws, as this can cause damage to the motherboard.
Step Five: Install the Drivers
The next step is to install the drivers for your motherboard. These can be found on the support page of the manufacturer’s website.
Once you have downloaded and extracted the files, you must install them. The first driver should be for the chipset, followed by the audio, then the video, and so on. You must install the drivers correctly to avoid any potential issues.
Conclusion
Installing a motherboard with a built-in I/O shield is a relatively easy task that can complete in just a few minutes.
You first need to make sure that your motherboard’s I/O shield is the right size for your case. If it’s not, you can either try to find an I/O shield that is the right size or buy a new case.
Once you have the right size I/O shield, you must put it in place and screw it into the case. That’s it! You’ve now installed your motherboard with a built-in I/O shield.
Frequently Asked Questions
What is an IO shield on a motherboard?
An IO shield is a metal or plastic plate that covers the opening on the back of a motherboard where the cables from external devices, such as a keyboard, mouse, or printer, plug in. The shield provides protection from dust and other debris that can accumulate inside the computer case.
Do motherboards have built in IO shield?
Motherboards do not have built in IO shields. However, many motherboards do come with a shield that can be attached to the motherboard.
Can you remove pre installed IO shield?
Yes, you can remove the IO shield. It is held in place by screws, so you can remove it by unscrewing it.
Do you put IO shield in before motherboard?
There is no one-size-fits-all answer to this question, as the order in which you install components into your computer will vary depending on the specific components and their configuration.
However, in general, you would install the motherboard into the case first, followed by the power supply, then the hard drives, optical drives, and other expansion cards. The IO shield is typically installed last.
![Why Motherboard Is Important? [Complete Details]](https://gamingwiser.com/wp-content/uploads/2021/11/Why-Motherboard-Is-Important-450x235.webp)