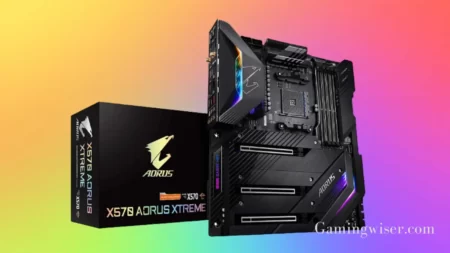
The dram light on motherboard signals the computer is communicating with the memory. If the light is flashing, it means there’s a problem. This article will show you how to fix a dram light on a motherboard. We’ll also show you how to determine if the problem is with the memory or the motherboard.
Dram Lights on Motherboard: What are They for?
Dram lights on the motherboard are small, discrete, and usually brightly coloured LEDs near the memory slots. The dram light is a very important part of your motherboard. It’s used to indicate problems with the memory on your motherboard.
If the light is off, the RAM is installed correctly. If it’s om, you’ll need to remove the RAM and reseat it correctly. The LED lights are usually red, green, or blue lights that can indicate the status of your RAM.
Causes of a DRAM Light:
The cause of a dram light on your motherboard can be very different. Sometimes the problem is with the memory, but it’s often caused by a faulty video card or even an ill-placed power supply.
The dram light may also be a result of an overheating CPU. If you are having trouble with your dram light, check the RAM first. If you can’t find any problems with the RAM, then look for other possible causes.
You can try a few things to fix the dram light on your motherboard. First, try to reconfigure your RAM. If that doesn’t work, you can try swapping out the RAM sticks or leaving just one in.
You can also try resetting your CMOS or updating your BIOS. If those don’t work, you may need to remove and reinstall the RAM stick or change the GPU slot. Finally, unplug all of the cables from your computer and then plug them back in again.
Quick Video Guide on How to fix dram light on motherboard
DRAM Light on Motherboard – Finding a problem
WARNING
Please be aware that this is entirely at your risk. We take no responsibility if something happens to your PC components during the procedure. We have succeeded; this can happen otherwise.
1. Reconfigure your RAM
This will show you how to reconfigure your RAM in the BIOS. This is useful if you have installed new RAM and the computer is not booting or installed more than one type/brand of RAM.
Reconfiguring your RAM in the BIOS is important if you have installed more than one type/brand of RAM or changed the total RAM amount.
- Navigate to the “Boot” tab and select “Boot Priority.”
- Choose the option to boot from your USB or CD/DVD drive. If this option is not available, skip stepping 6.
- Change the boot order, so your USB or CD/DVD drive is first in line. This will cause your computer to boot from the drive, allowing you to access the BIOS menu.
- Select the “Exit” option and then choose “Save Changes.” Your computer will reboot and should now boot from your USB drive or CD/DVD drive.
- Press F10 to save changes and exit BIOS. Your computer should now boot into Windows normally. Swap RAM sticks- how to do it and what it does. It’s easy to do, and it might fix the problem:
- Power down your PC and unplug all cables.
- Please find the two RAM sticks in your system and note their positions. The slot farthest from the CPU is typically channelled A, and the other is Channel B.
- Pull out both RAM sticks and set them aside.
- Insert one RAM stick into Channel A. Make sure it clicks into place.
- Insert the other RAM stick into Channel B. Again, ensure it clicks into place.
- Plug all cables back into your PC and power it on
Crossing your fingers may or may not help at this point. Leave just one RAM stick- how to do it and what it does. Always make sure to touch something metal before handling RAM, such as the case of your computer. This will ground you and prevent static electricity from damaging your components.
2. Update Your BIOS:
Updating your BIOS is a simple process that can fix many common issues with your computer. Updating your BIOS may be the solution if you are experiencing problems with the DRAM light on your motherboard.
If you want to update your BIOS, you will need to download the new BIOS files from the manufacturer’s website and then use a program like Universal Extractor to extract the files from the .exe file.
Once you have extracted the files, you need to copy them to a USB drive and boot them into the BIOS menu. You will need to find the “update” option and select it. Once you have selected it, you must follow the on-screen instructions to update your BIOS.
It is important to note that updating your BIOS can be risky; if something goes wrong during the process, it could render your computer unusable. As such, it is always recommended that you create a backup of your existing BIOS before proceeding with an update.
Here’s how to update your bios:
- You will need to download the latest version from the manufacturer’s website to update your BIOS.
- Once you have downloaded the latest BIOS version, you must create a bootable USB drive or CD.
- After creating the bootable media, you must restart your computer and enter the BIOS setup menu.
- In the BIOS setup menu, please navigate to the Update BIOS option and select it.
- Follow the instructions on the screen to update your BIOS. This may take a few minutes to complete.
Once the update process is completed, the system will restart, and your DRAM light should now be off. If this does not work, you may need to contact your motherboard manufacturer for further assistance.
3. Reset your CMOS
If updating BIOS didn’t solve the dram light problem, Resetting CMOS would be a good idea.
Resetting your CMOS is easy. Turn your computer off, remove the power cord and hold down the reset button until you hear four beeps. Put your computer back together and turn it on. You should now see a message stating that the CMOS is set to default settings.
Here’s a step-by-step guide to resetting your CMOS
1. Turn off the computer and unplug it from the power outlet.
2. Hold the power button for at least five seconds until you see the BIOS setup menu.
3. Select the CMOS Setup option that corresponds to your motherboard.
4. Enter the security code, which will be located on a sticker on the computer case or in the access panel.
5. Select Save and Exit and save your settings before exiting CMOS by pressing <Enter>.
6. Plug your computer back into the power outlet.
7. Turn on the computer and allow it to boot up normally.
What does resetting the CMOS do?
When you reset the CMOS, it resets a few settings stored on the motherboard. The most important setting it resets is the password. If you set a password for your BIOS, you will need to know what it is to change any other settings.
Other settings that are usually reset are the system clock, boot sequence, and any drive or-peripheral settings that have been changed from their factory defaults.
Remove and reinstall the RAM stick:
Suppose the above steps didn’t solve the Dram Lights issue. Ten removing and reinstalling the RAM stick may solve the problem.
If your computer is still under warranty, it is best to take it back to the store and let them handle it. If you’re comfortable working inside your computer, you can try reseating or removing and then reinstalling your RAM.
This process involves taking out the RAM sticks and putting them back in, ensuring they go in all the way. It’s also possible that one of your RAM sticks is bad. Try removing one and see if that helps. If not, try the other one.
Change GPU slot
If You’re Still experiencing the DRAM light on your motherboard, it’s likely because your graphics card has been inserted into the wrong slot. To do this, switch the graphics card and RAM to a different slot.
For example, if your graphics card is in slot number 11 and your RAM is in slot number 8, move the graphics card to slot 9 and your RAM to slot 10.
Your graphics card is in the wrong slot if you still have the DRAM light. If your motherboard is a board with 3 slots, there are two more options: Try putting the graphics card in slot number 6. If it doesn’t work, try slot 5. This should fix the DRAM light on your motherboard.
Conclusion
You can do a few things to try and fix the dram light on your motherboard. If these solutions don’t work, you may need to replace the motherboard. Be sure to backup your data before doing so.
FAQs
Frequently Asked Questions
How do you Fix a DRAM Light on a Motherboard?
The first step is to identify which type of DRAM light is on the motherboard. There are two types: single inline memory module (SIMM) and dual inline memory module (DIMM). Once the type of DRAM light is identified, the next step is to determine whether it is a single or double-sided light.
What Does the DRAM Light Mean on My Motherboard?
Dram lights on the motherboard are small, discrete, and usually brightly coloured LEDs near the memory slots. They indicate whether or not a given stick of RAM is properly seated in the slot. If the light is on, the RAM is installed correctly. If it’s off, you’ll need to remove the RAM and reseat it correctly.
A red light on motherboard DRAM
A red light on a motherboard usually means that there is a problem with the DRAM or memory. This can be caused by several things, such as a faulty memory module, incorrect memory settings, or a bad connection.
If you see a red light on your motherboard, try restarting your computer and checking the BIOS settings to ensure the memory is configured correctly. If that doesn’t work, you may need to replace the memory module.
What is a DRAM Error?
A DRAM Error is an error that can occur when data is being read from or written to a computer’s main memory.
Can I Turn the Orange Light on My Motherboard Off?
Yes, you can. The orange light on your motherboard is usually a power light. To turn it off, you can either unplug your computer or press the power button to turn it off.
How to fix DRAM light on ASUS motherboard
If your DRAM light is on, your system is not detecting the memory. There are a few things you can do to try to fix this:
– Make sure that the memory is properly seated in the socket. – Try reseating the CPU. – Try another memory module.
– Check for bent pins on the memory module or motherboard socket. – If all else fails, try flashing the BIOS.

![How to fix dram light on motherboard [Solved]](https://gamingwiser.com/wp-content/uploads/2022/08/How-to-fix-dram-light-on-motherboard.webp)
![Why Motherboard Is Important? [Complete Details]](https://gamingwiser.com/wp-content/uploads/2021/11/Why-Motherboard-Is-Important-450x235.webp)

